Guide 7 of 15 · Follow-ups and messages
Sending from your own email domain
Until you set this up, emails go from our shared sender with your business name on them, and replies still come straight to you. Sending from your own address helps them reach inboxes and look like they came from you.
Set up your domain
-
Enter your domain
In Settings > Email domain, enter the domain from your website or business email: just the part after the @, with no www. Free email services can’t be used.
-
Choose the sender
Send from is the name before the @, such as quotes. Replies go to is the inbox you actually read.
-
Make the records
Press Create DNS records. These are a few settings for your domain, each with a Copy button.
-
Add them where your domain is managed
That is your domain provider’s website, or whoever looks after your website. Send them the records if it is easier.
-
Check
Press Verify. It shows Pending until your domain provider has the records, then Verified. From then on customers see emails from your own address.
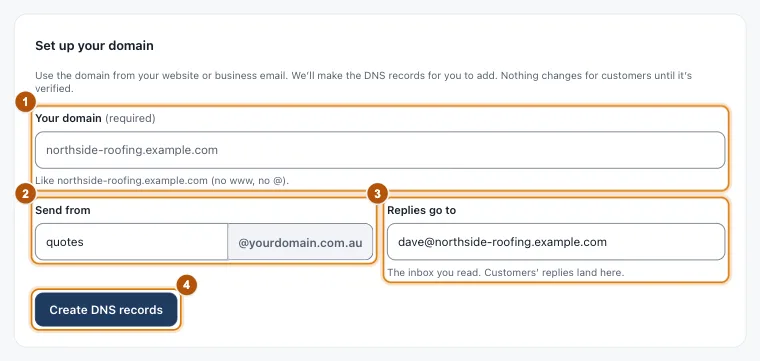
- Marker 1: Your domain
- Marker 2: Send from
- Marker 3: Replies go to
- Marker 4: Create DNS records
Tracking and your privacy policy
Each email has its own link to the quote, so you can see when it was opened. The open-tracking image is optional and off to start with. It only ever shows a “maybe opened” hint, because mail apps load or block images on their own.
Tracking links must be in your privacy policy. Press Copy wording and paste it into yours.
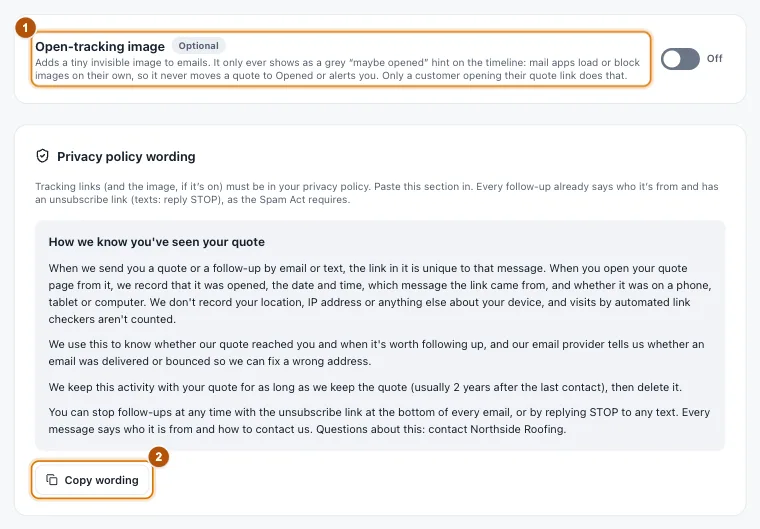
- Marker 1: The optional open-tracking image
- Marker 2: Copy wording for your privacy policy
Still stuck?
Reply to any email from us, or contact us using the form on the home page.